






Starting a small herb garden indoors is a rewarding and enjoyable way to bring fresh flavors into your kitchen, enhance your cooking, and add a touch of green to your living space. Even if you don’t have a backyard or much space, growing herbs indoors is simple and requires minimal effort once you know the basics. This guide will take you through the entire process, from selecting herbs to caring for your garden.
Why Grow Herbs Indoors?
Growing herbs indoors is convenient and cost-effective. You can snip fresh leaves as you cook, ensuring the best flavor and aroma. Indoor herb gardens also brighten your home and can improve air quality. Plus, growing your own herbs means you control what goes into your plants—no pesticides or chemicals needed.
Choosing the Right Herbs for Your Indoor Garden
Not all herbs thrive indoors, so it’s best to start with easy-to-grow varieties. Some popular indoor herbs include:
– Basil: Great for cooking, but needs plenty of sunlight.
– Parsley: Versatile and tolerant of moderate light.
– Mint: Easy to grow but can spread quickly—use a separate pot.
– Thyme: Low maintenance, thrives in bright indoor spots.
– Chives: Require less light and grow well on windowsills.
– Cilantro: Prefers cooler indoor temperatures and bright light.
– Oregano: Needs bright light and well-drained soil.
Choose herbs that you use often and enjoy. Starting with 3-4 varieties in small pots is a good way to test what grows best in your home environment.
What You’ll Need to Get Started
Before planting, gather the following supplies:
– Containers: Small pots with drainage holes are essential to prevent waterlogging.
– Potting Mix: Use a light, well-draining potting soil designed for indoor plants.
– Seeds or Starter Plants: Seeds are economical, but starter plants give you a quicker start.
– Watering Can or Spray Bottle: For gentle watering.
– Label Markers: To keep track of your herbs.
– A Sunny Spot or Grow Lights: Most herbs need 6-8 hours of sunlight daily.
Step-by-Step Guide to Planting Your Indoor Herb Garden
1. Select Your Containers
Choose pots that are about 4-6 inches in diameter to give your herbs enough space to grow. Make sure each pot has good drainage to avoid root rot. You can use ceramic, plastic, or even recycled containers, but always check for drainage holes.
2. Prepare the Potting Mix
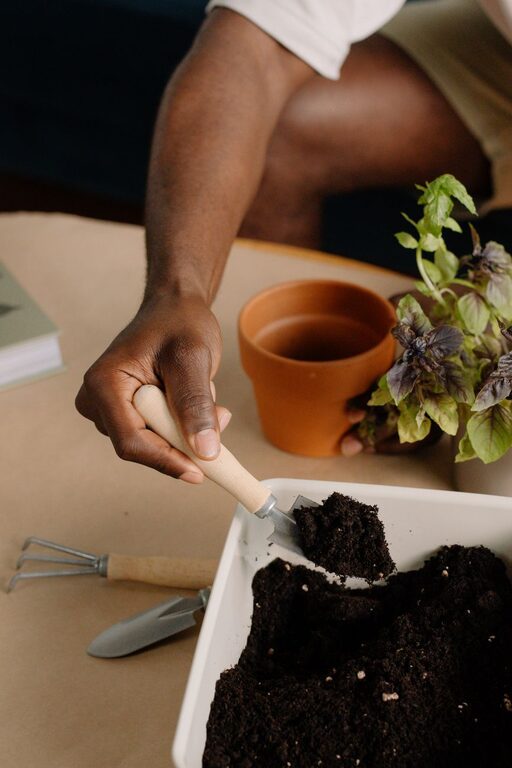
Fill your pots with a high-quality potting mix. Avoid garden soil, which can be too heavy and may contain pests. Lightly moisten the soil before planting.
3. Plant the Seeds or Starter Plants
– For seeds: Follow the package instructions for depth and spacing. Lightly cover seeds with soil and gently pat down.
– For starter plants: Dig a small hole and place the plant’s root ball into the soil. Firmly press soil around the base.
Water gently after planting.
4. Position Your Garden
Place your pots in a spot that receives plenty of bright, indirect sunlight. South or southwest-facing windows are ideal. If natural light is limited, consider using grow lights to provide the necessary light intensity.
5. Water Properly
Herbs prefer slightly moist soil but not soggy. Water when the top inch of soil feels dry. Avoid overwatering by checking pots regularly. A spray bottle can help mist delicate seedlings.
6. Feed Your Herbs
Use a balanced, water-soluble fertilizer every 4-6 weeks to provide nutrients. Follow the instructions carefully to avoid overfeeding, which can harm herbs.
Caring for Your Indoor Herb Garden
Pruning and Harvesting
Regularly trim your herbs to encourage growth and prevent them from becoming leggy. Pinch off leaves or harvest entire stems, but avoid taking more than one-third of the plant at once. Frequent harvesting promotes bushier plants.
Monitoring for Pests
Indoor herbs can occasionally attract pests like aphids or spider mites. Keep an eye out for any unusual spots or webs. Wipe leaves gently with a damp cloth or use mild, natural insecticidal soap if needed.
Adjusting to Indoor Conditions
Indoor air can be dry, especially in winter. Use a humidifier or place a tray of water near your plants to increase humidity. Rotate pots weekly to ensure even light exposure and prevent plants from leaning toward the window.
Troubleshooting Common Issues
– Yellowing leaves: Usually a sign of overwatering or poor drainage.
– Leggy growth: Indicates insufficient light; move plants closer to a window or use grow lights.
– Slow growth: Could be due to nutrient deficiency; consider feeding your herbs or repotting.
Benefits of an Indoor Herb Garden
Beyond fresh herbs, an indoor garden offers therapeutic benefits like reducing stress and enhancing indoor air quality. It’s a fun, interactive way to connect with nature right from your kitchen.
Final Tips
– Start small, and gradually expand as you become more confident.
– Experiment with different herbs and container styles.
– Keep notes on what works best in your indoor environment.
Creating a small indoor herb garden is a wonderfully rewarding project that brings freshness and life into your home. With just a bit of light, water, and care, you’ll enjoy your own home-grown herbs all year round. Happy gardening!